Pre-requisites:
- Zapfloor Account
- Outlook Account
- Azure admin rights
Follow the below steps to start with the configuration:
-
Login into Azure
-
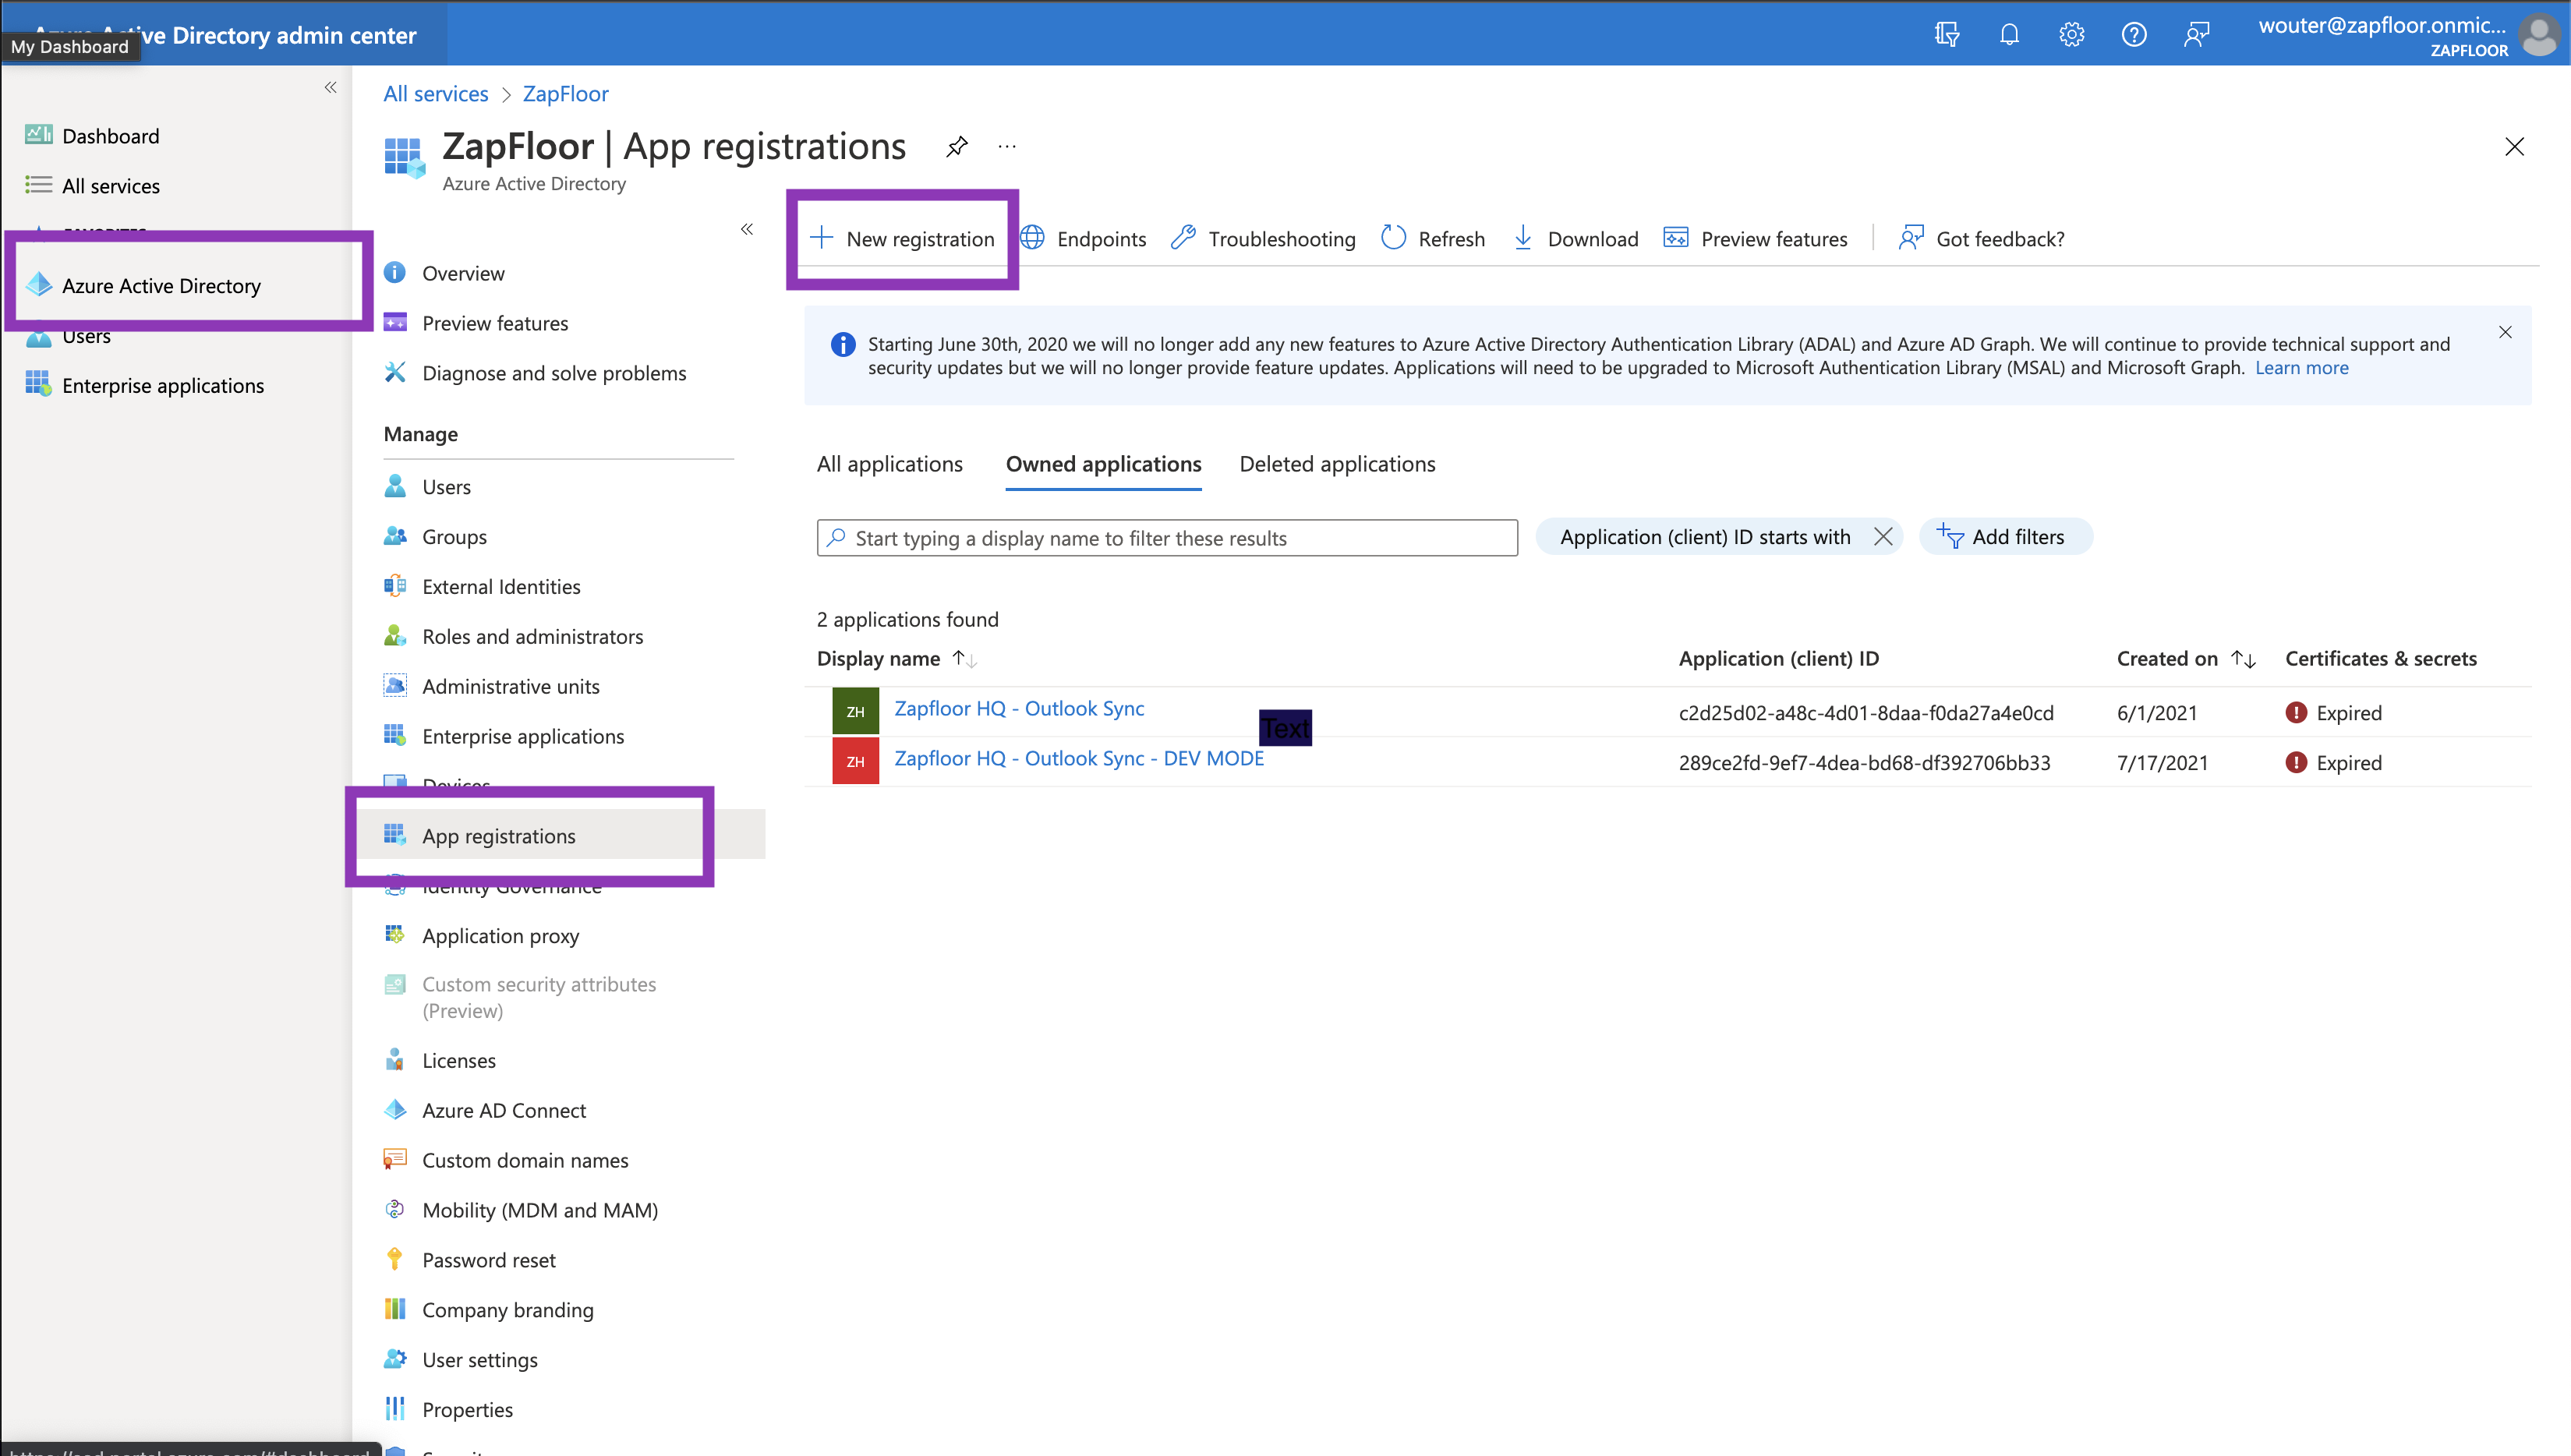
Go to "Azure Active Directory" in the left menu
-
Go to "App Registrations"
-
Click on "New Registration
-
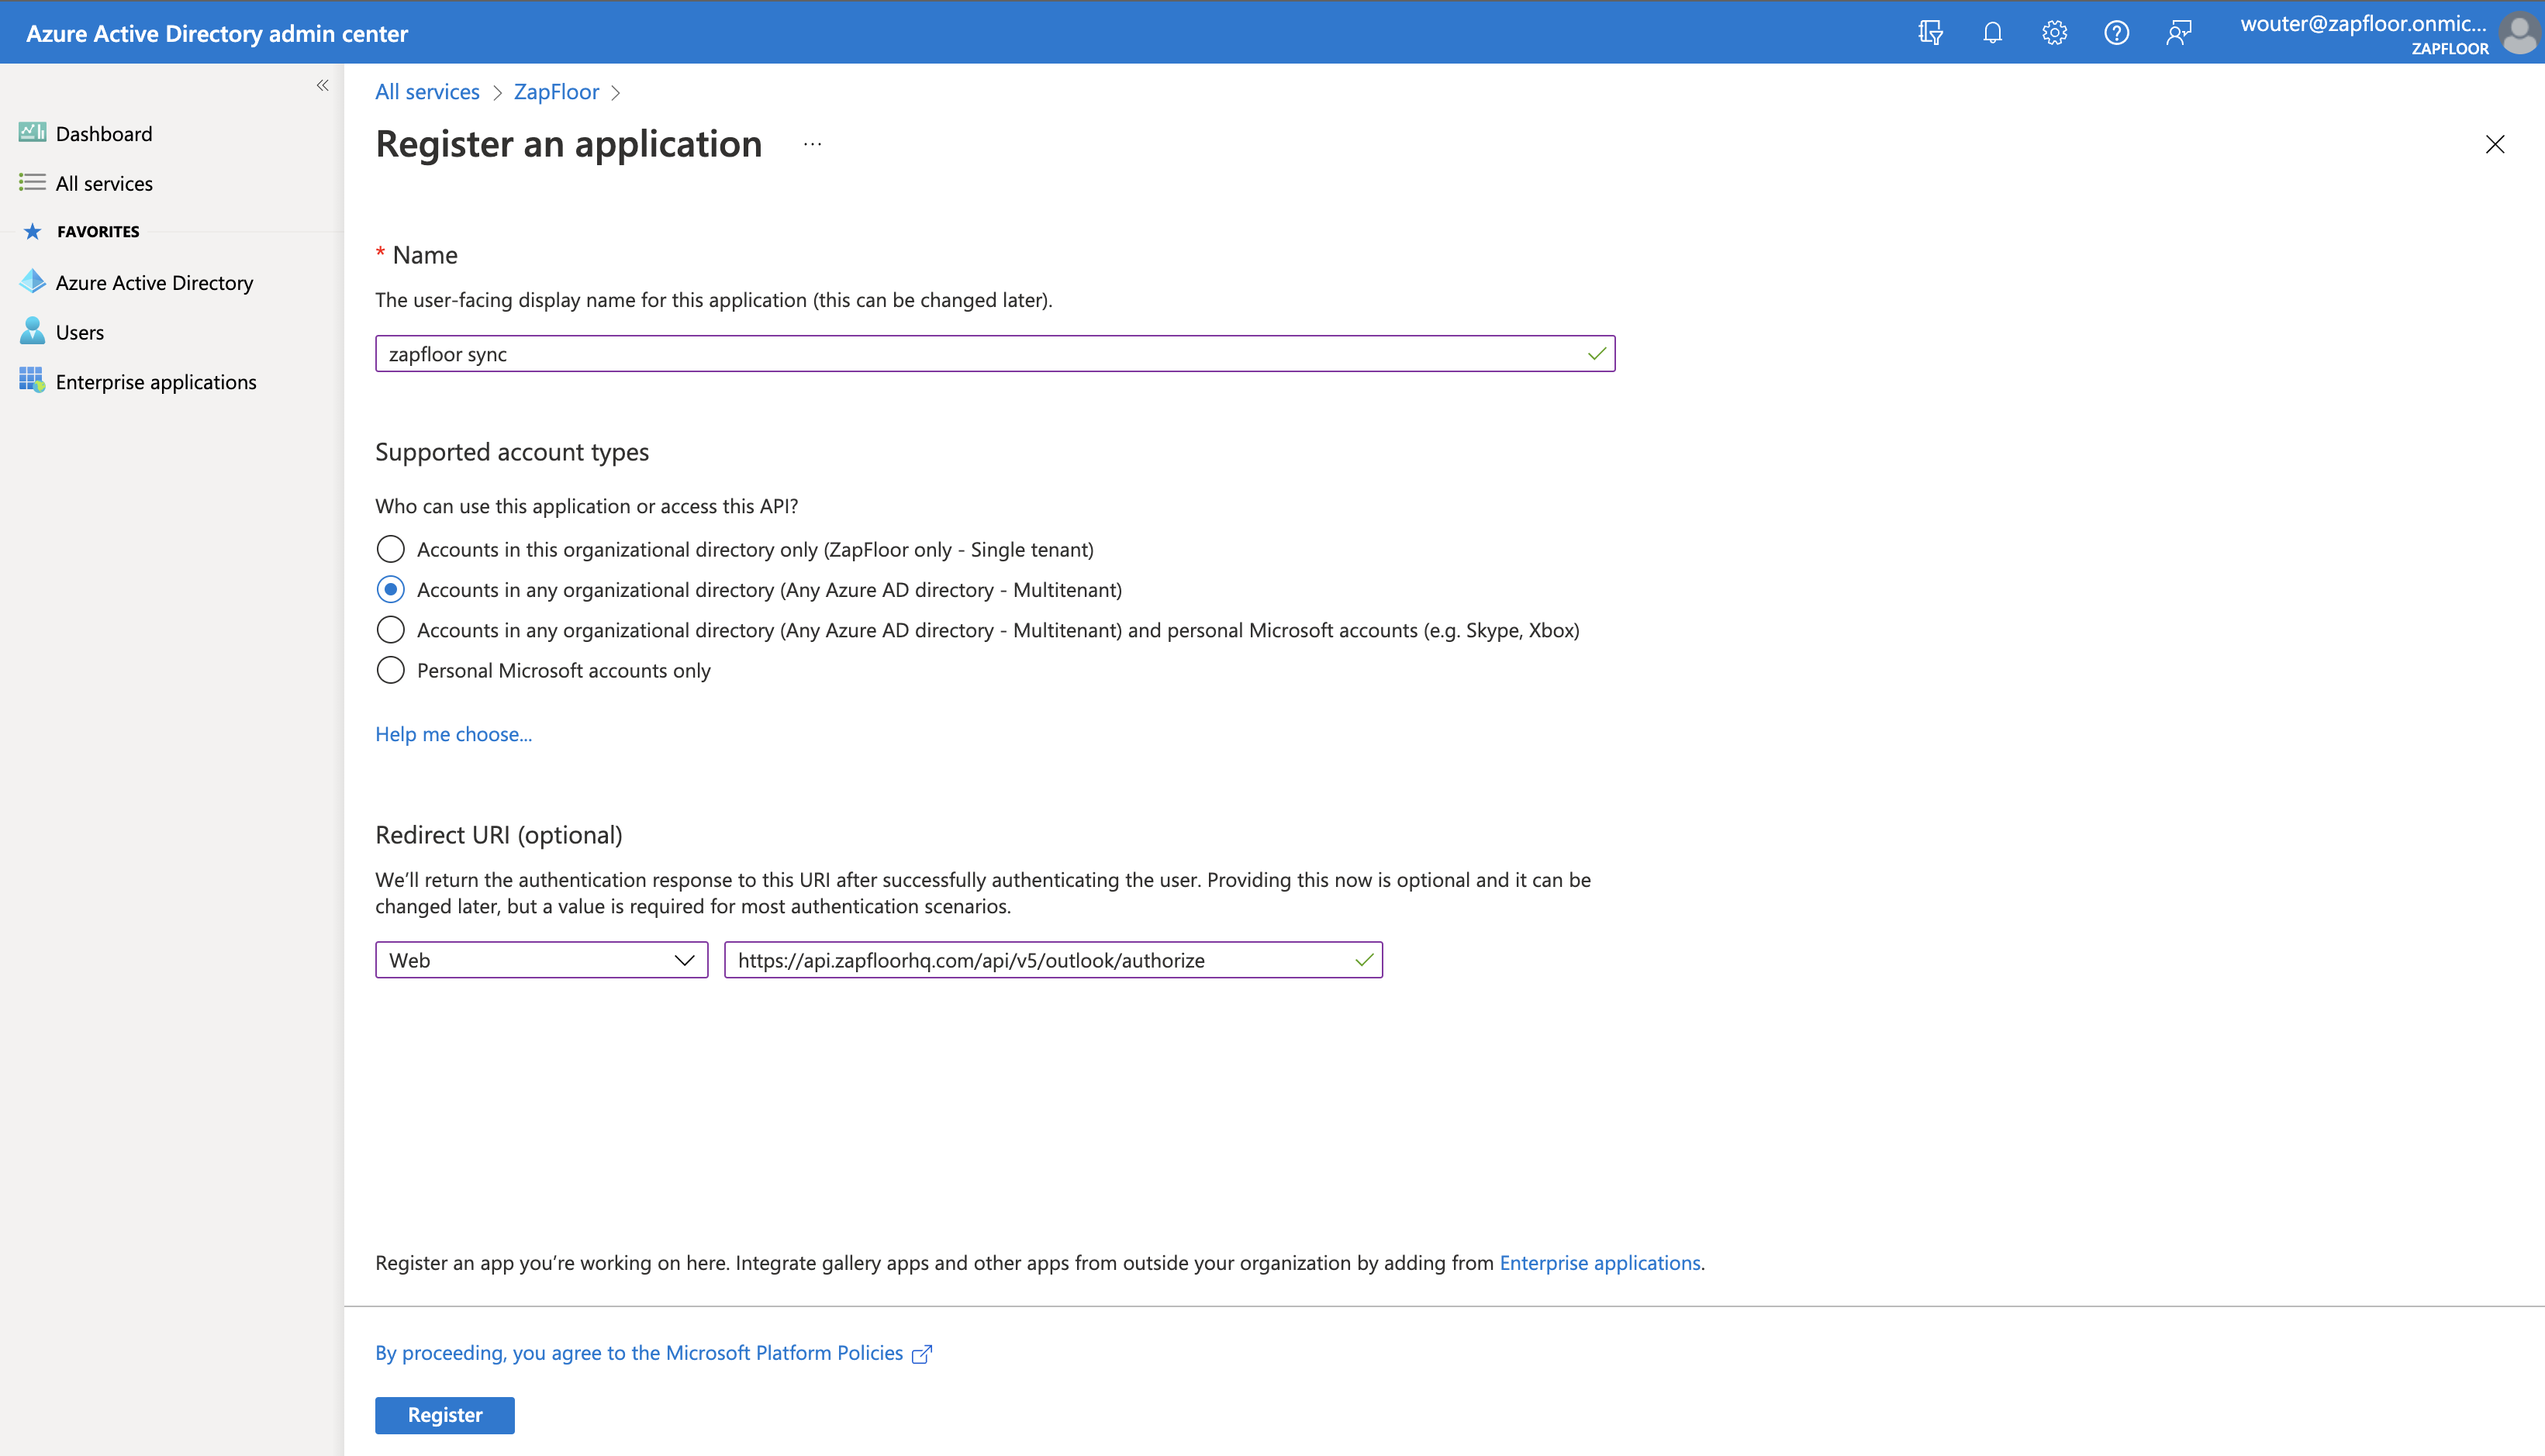
To create a "new registration"
-
Fill in a name that refers to zapfloor
-
Supported account types:
-
Select "Accounts in an organizational director (Anv Azure AD director - Multitenant'")
-
-
Redirect URL is required for zapfloor.
-
Add the following webhook urls:
-
-
Supported account types depends on how your outlook tenant is setup. Is it single tenant, take single tenant.
-
Implicit grant and hybrid flows can be ignored
-
Click on "Register"
Give the application the right permissions
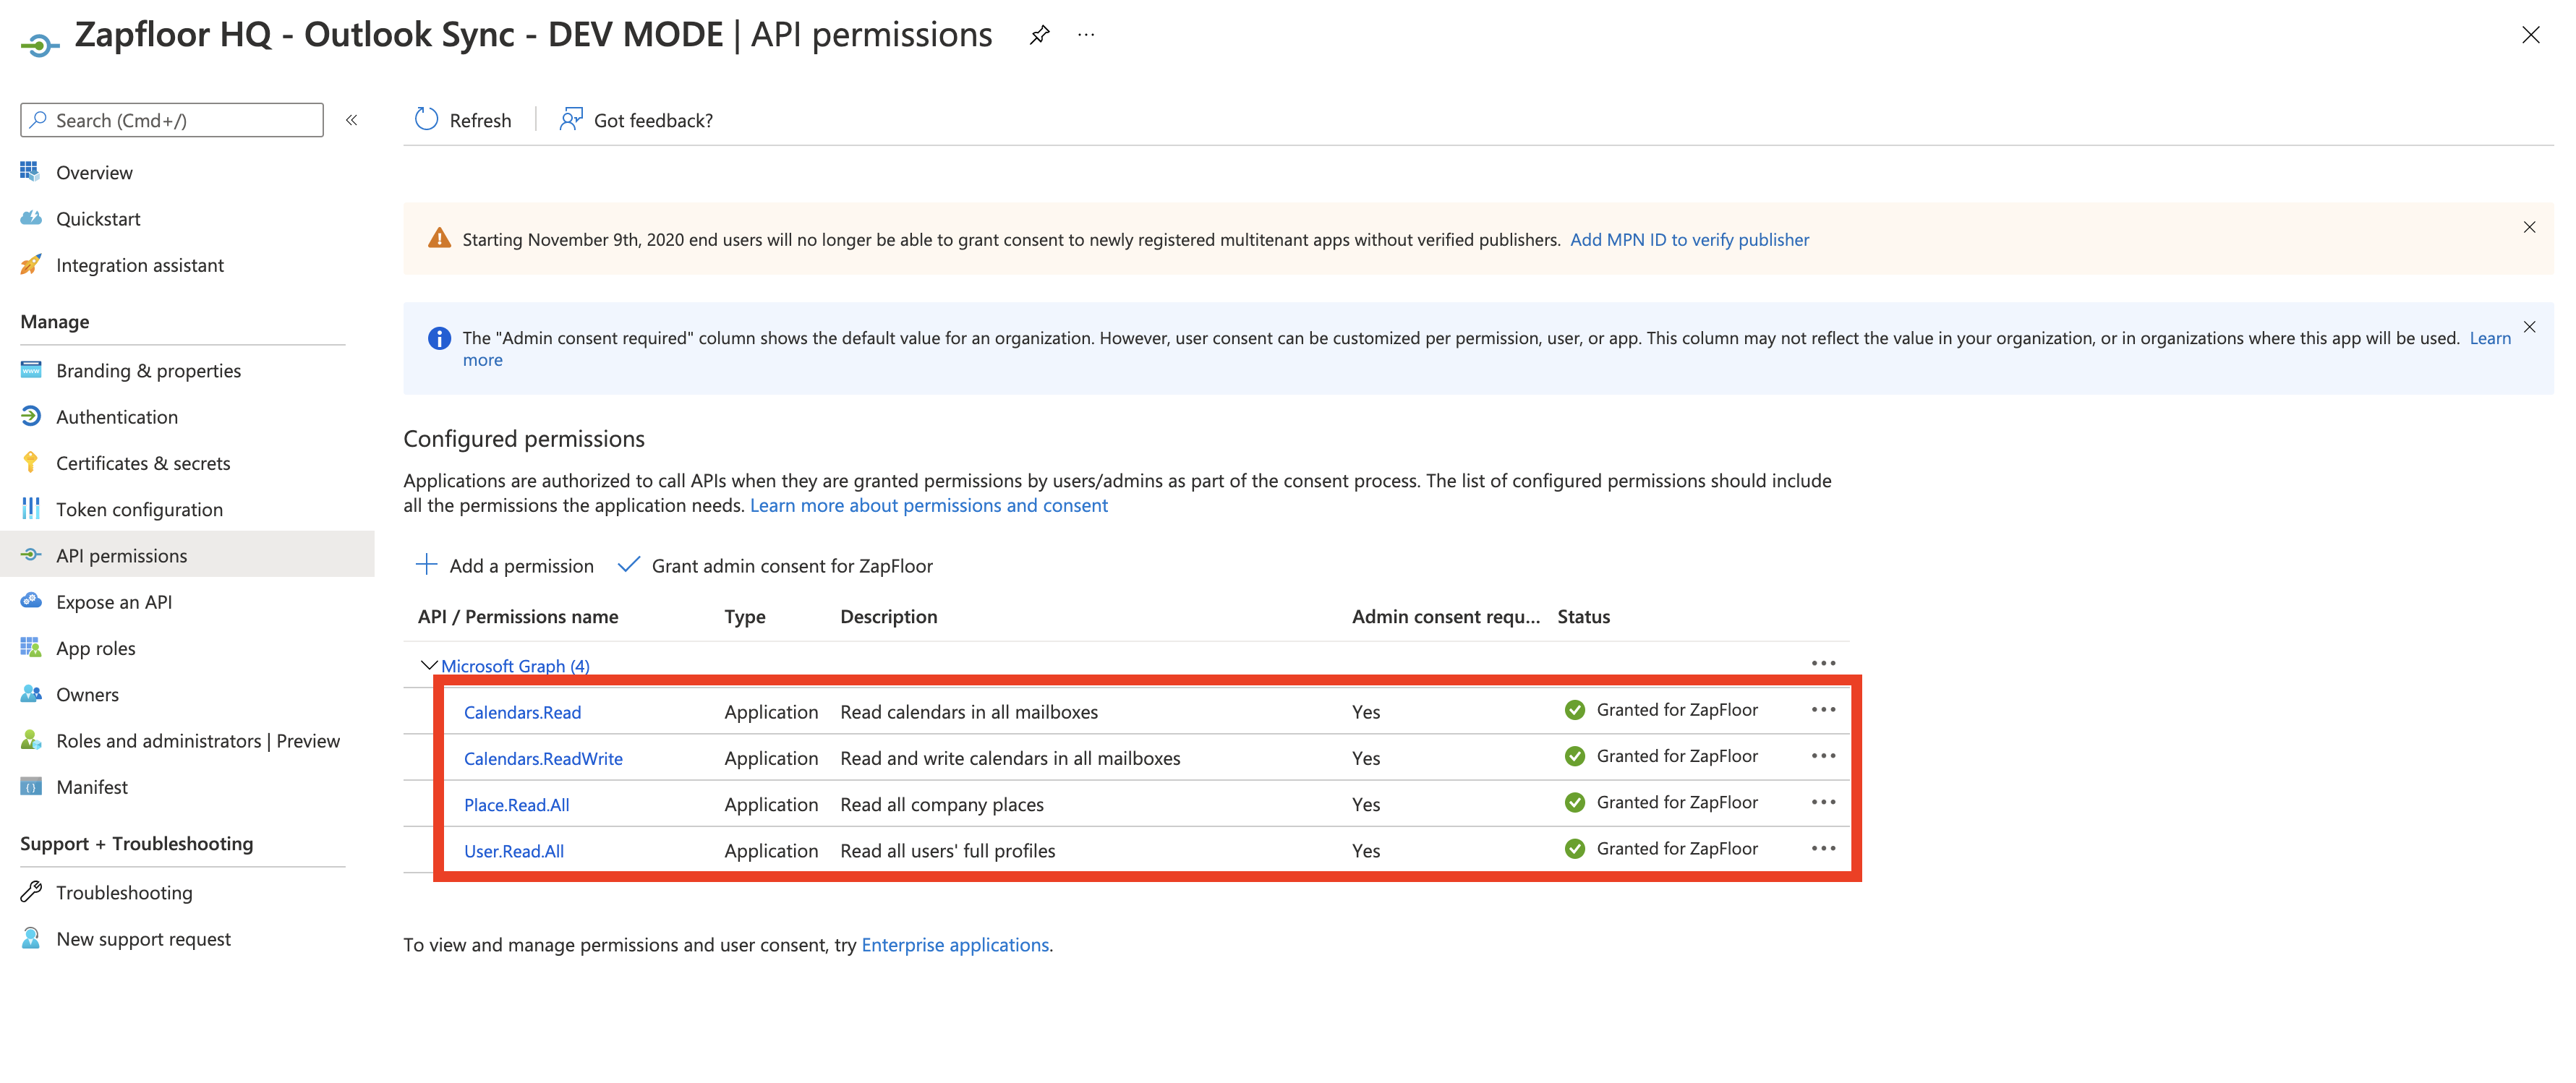
The new application that is registered now needs extra permissions to be able to create events on resources:
-
In the application go to "API permissions"
-
Click on "Add a permission"
-
Click on "Microsoft Graph" at the top
-
Select "Application permissions"
-
The permissions you have to add is depending on how you want to set up the integration.
-
Global administrator level permissions for a service account to handle meeting room bookings across an organisation
-
Calendars.Read
-
Calendars.ReadWrite
-
Place.Read.All
-
User.Read.All
-
-
Using an user account as service account with limited rights (delegated)
-
Calendars.ReadWrite.shared
-
email
-
offline_access
-
profile
-
User.read
-
-
-
When you are setting up the integration with global admin rights, you have to grant admin consent for the application which you can find in the overview of the permissions. Check the "Status" column if it worked out.
Client Secret
-
Go to "Certificates & Secrets" -> "Client secrets"
-
-
Description "zapfloor"
-
Expires: this is something you can choose. Every time when it's expired you have to create a new one
-
Don't forget to copy paste the VALUE and not Secret ID
Click on "New Client secret"
-
Add Application details to zapfloor
-
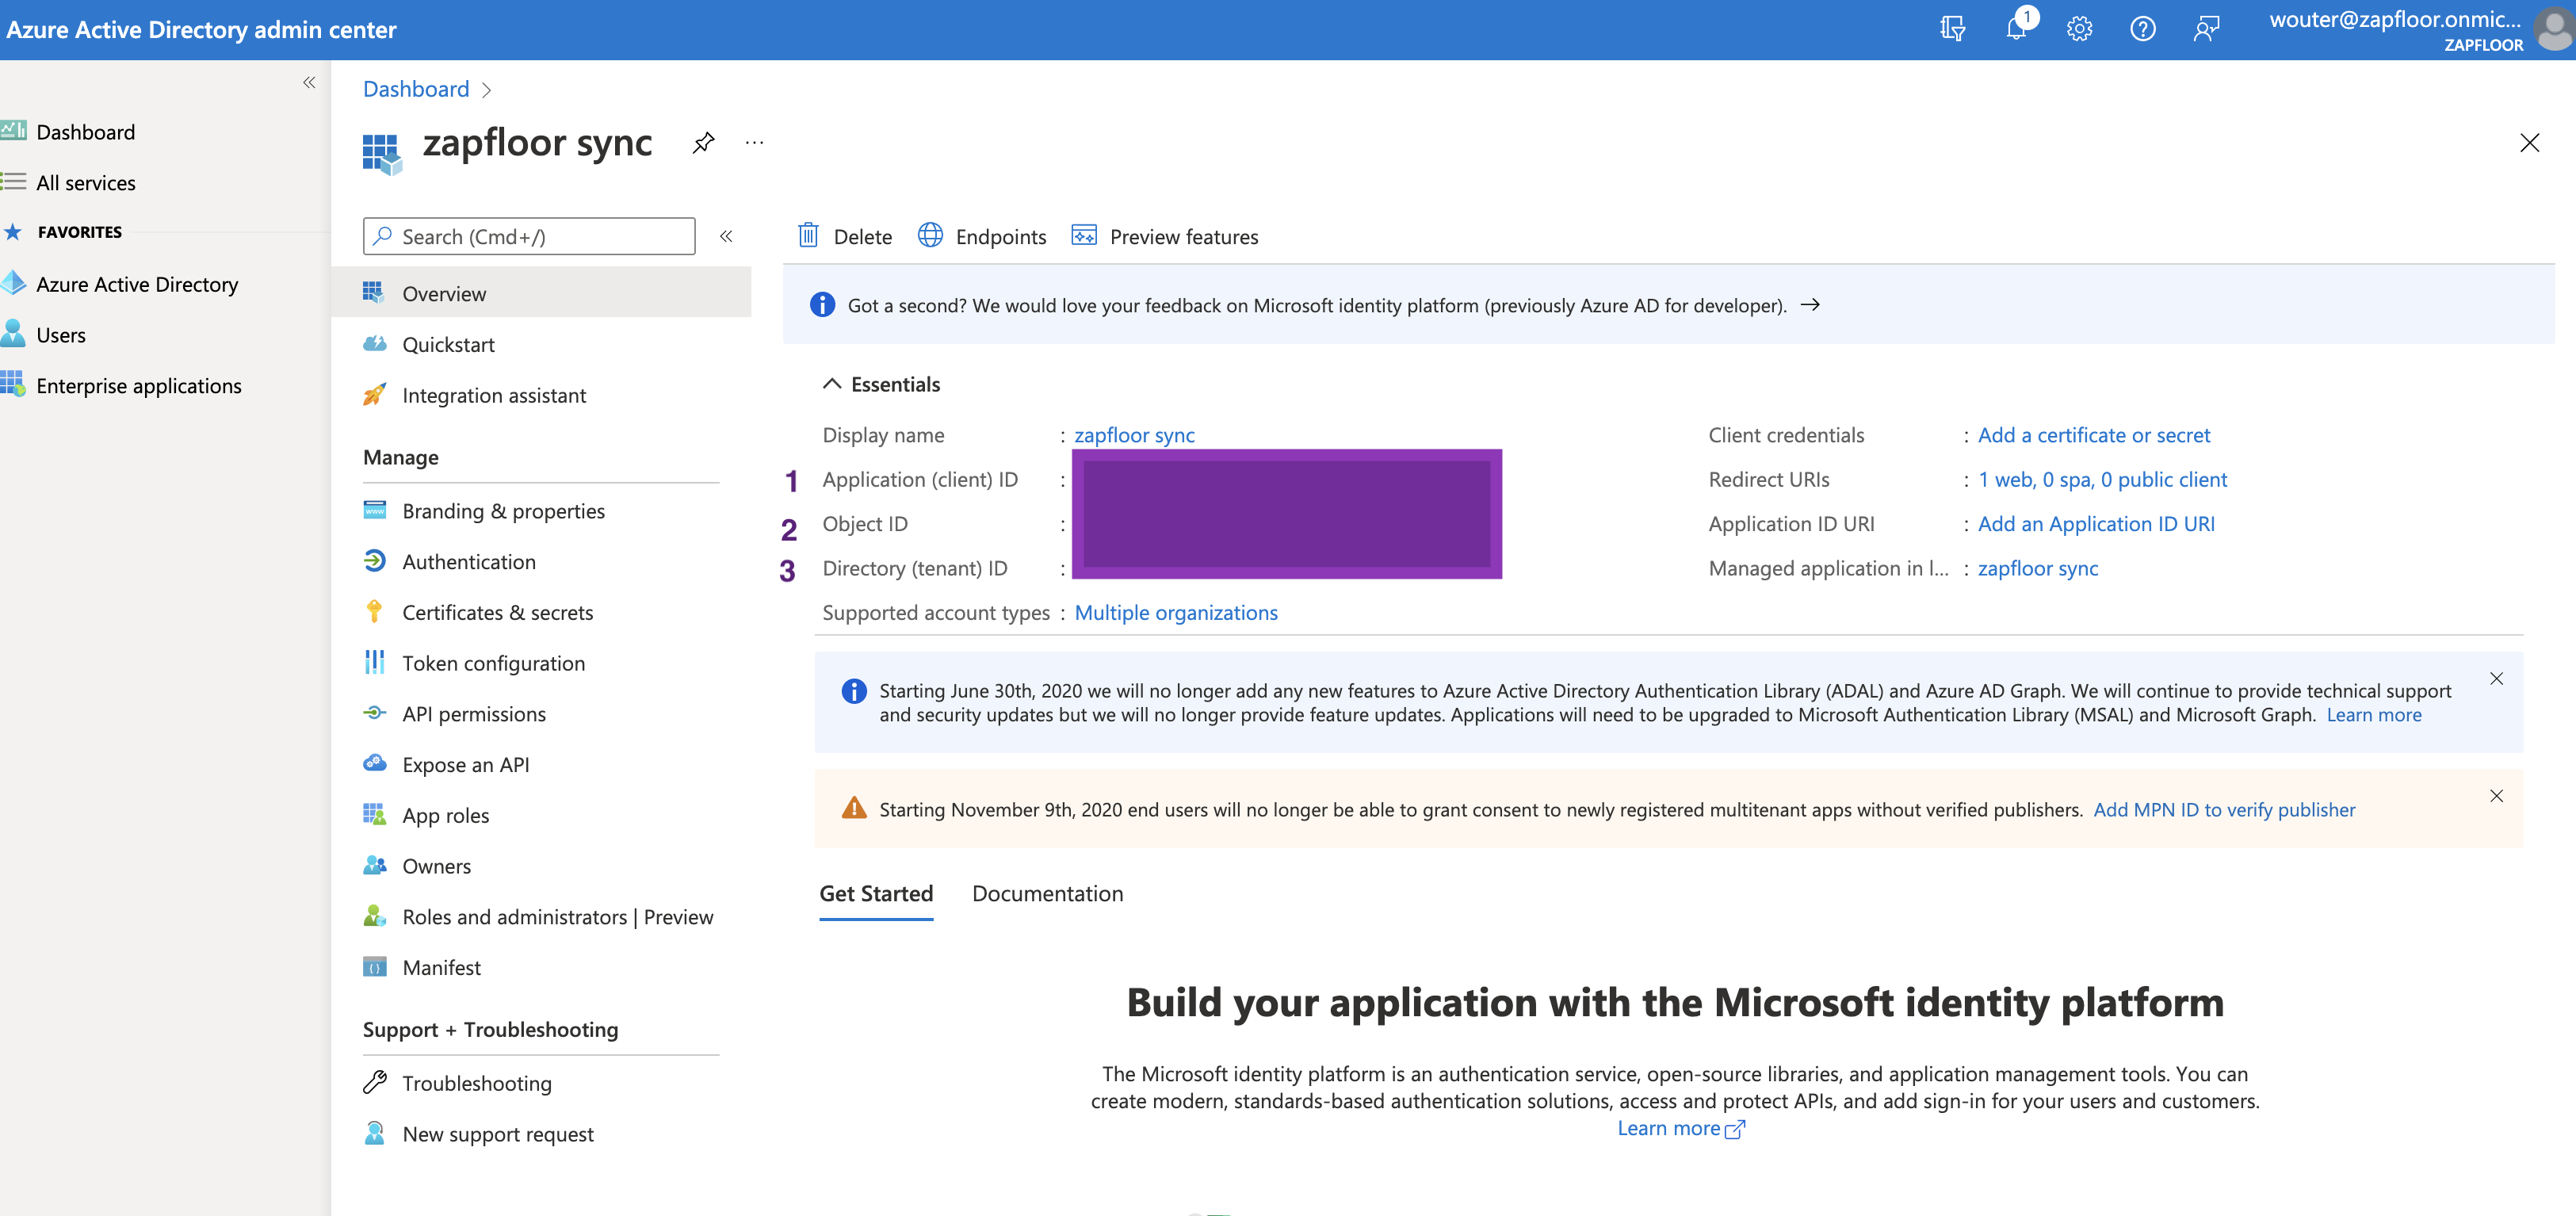
You can find the details of the application in azure under "Overview" of the created application
-
Go to zapfloor -> Integrations -> Outlook
-
Tenant ID *: Field with "3" before in the screenshot below
-
Client ID *: Field with "1" before in the screenshot below
-
Client Secret *: take the Secret Value (not ID) from the secret you created under "Certificates & Secrets" in previous step
-
Fallback email address (required)
-
When a user in zapfloor does not exist in your Outlook tenant environment, we still need to create the reservations. We need to create them with a general email address
-
We suggest to create a user specific for this integration with a license to easily identify bookings for bookings created in zapfloor from a not existing user in Outlook
-
-
-
After saving the credentials in zapfloor -> Click on "Connect & Consent App"
-
Now we start creating the subscriptions for all resources (meeting rooms)
-
This can take some time
-
Refresh the page to see if all the meeting room bookings in the list are visible under "Active subscriptions"
-
Now the integration is setup!
➡️ Next step is to link the meeting room, we'll show you how to here.
Some addition information:
-
Email address for all bookings (optional)
-
Keep this field empty if you want to create bookings in name of the Outlook user
-
-
Please make sure all meeting rooms in zapfloor are linked to the resources in outlook