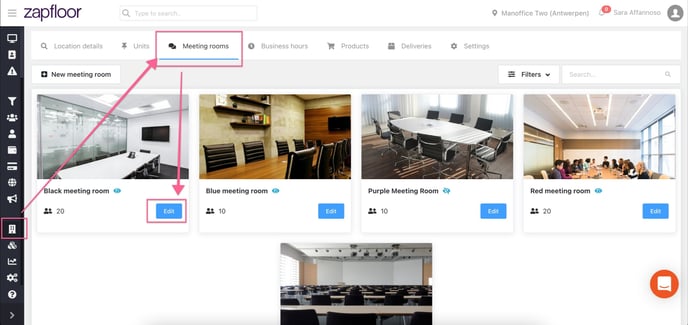
1. Set up which meeting rooms should be bookable via the website
Log in and Go to My Center > go to Meeting Rooms and click on Edit for a specific meeting room
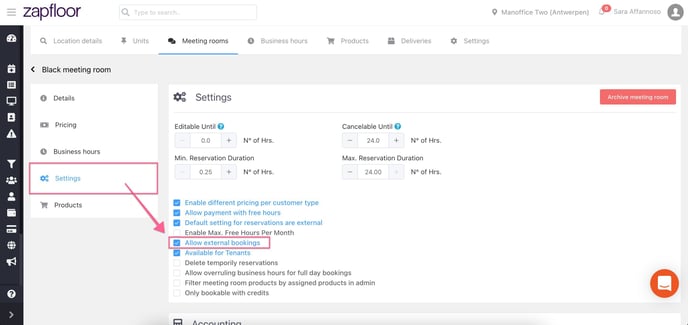
Go to Settings, Enable 'Allow external bookings' and scroll down to click on Save
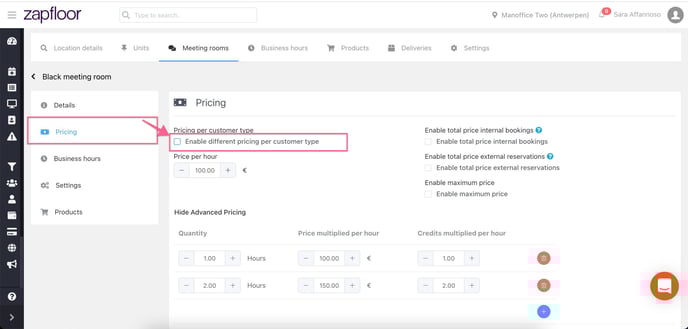
2. Set up the pricing for external bookings
Should externals pay a different price per hour than members, this is something that can be set up on the meeting room level. Go to My Center > Meeting rooms, select a room and go to Pricing and click Enable different pricing per customer types
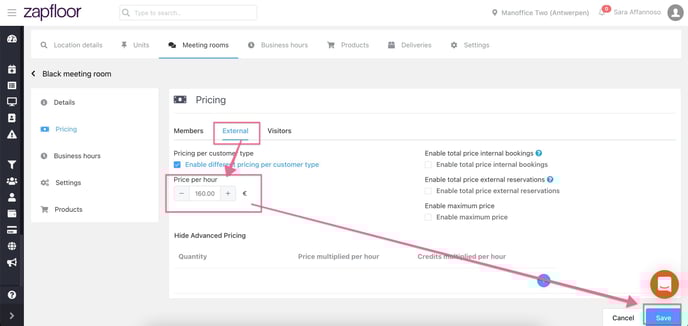
Now a new option is available: Externals, click on it, set up your pricing for externals and hit Save
3. Connecting your Stripe Account
After this is done, the next important step is for you to connect your Stripe account. For that please refer to this article:
4. Implement the iframe in your website
Get in touch with us at Zapfloor to receive your token for the Iframe. Once you have the token, to activate the Iframe, please add this html tag in your webpage.
To activate the iframe, please add this HTML tag inside the webpage:
<iframe src="https://meeting-room-iframe.herokuapp.com/?token=YYY&termsandconditions=https://XXX&css=ZZZ&redirecturl=WWW"> </iframe>
or short version, without CSS:
<iframe src="https://meeting-room-iframe.herokuapp.com/?token=YYY&termsandconditions=https://XXX&redirecturl=WWW"> </iframe>
Some extra information about setting the URL:
- You’ll need to add your token in the YYY field.
-
You’ll need to add your own page with terms and conditions in the XXX field.
-
(Optional) Language selector: code in URL. Example, Dutch: https://meeting-room-iframe.herokuapp.com/nl
-
(Optional) To add custom CSS (lay out): after terms add "&css=ZZZ" to the URL. Replace ZZZ by you own CSS file (url) to enable your own lay out.
Don't want to use this? Just delete “&css=ZZZ” from the example above.
- Add redirect url, customer goes to this page when payment is done, add URL in WWW field. This is often a kind of thank you page, that also helps with tracking the success in Analytics.
5. Verify your general iframe settings in Zapfloor
Go to My Center > Settings, Meeting rooms, scroll until the section Iframe settings, and check that the settings are according to your needs.

| Iframe minimum duration | The minimum duration externals can book via the website (1 = 1 hour, 0,5 = 30 minutes). |
|
Iframe slot duration |
Default duration of a time slot. |
| Iframe book in advance | The number of days in advance a booking can be made. |
| Bancontact for meeting room booker iframe | Allow externals to pay via Bancontact. |
| Iframe allow weekend bookings meetings for tenants | Allow bookings during the weekend. |
| Send login after user has booked a desk through iframe | After a booking is done the external receives automatically login credentials to access Zapfloor. (We advise you to get in touch with us to discuss this option before enabling it). |
| Assign to all locations | When an external books they are automatically added to all your locations, not only the one they booked in. |
| Hide international customer checkbox | The international customer checkbox allows external to select if they are an internal customer, internal customers are tax-exempt. |
| Allow pay later | Allow externals too choose between paying now or paying later. You will need to send an invoice to them. |
| Iframe start/end time | Sets the time range during which externals can book. |
A view of the Pay later option on the iframe:
.png?width=688&height=425&name=Screenshot%202025-05-06%20at%2009.31.30%20(1).png)