Configure a "pay now" button in your emails with Mollie
Mollie allows you to add a "pay now" button to your invoice emails, enabling customers to pay immediately after receiving them.
Setup Process
1. Create a Mollie Account
- Visit Mollie and click Sign Up.
- Follow the steps to create your account.
2. Configure Your Payment Methods in Mollie
- Choose the payment methods you want to offer. Find more details here.
3. Connect Your Mollie Account to Your Zapfloor Account
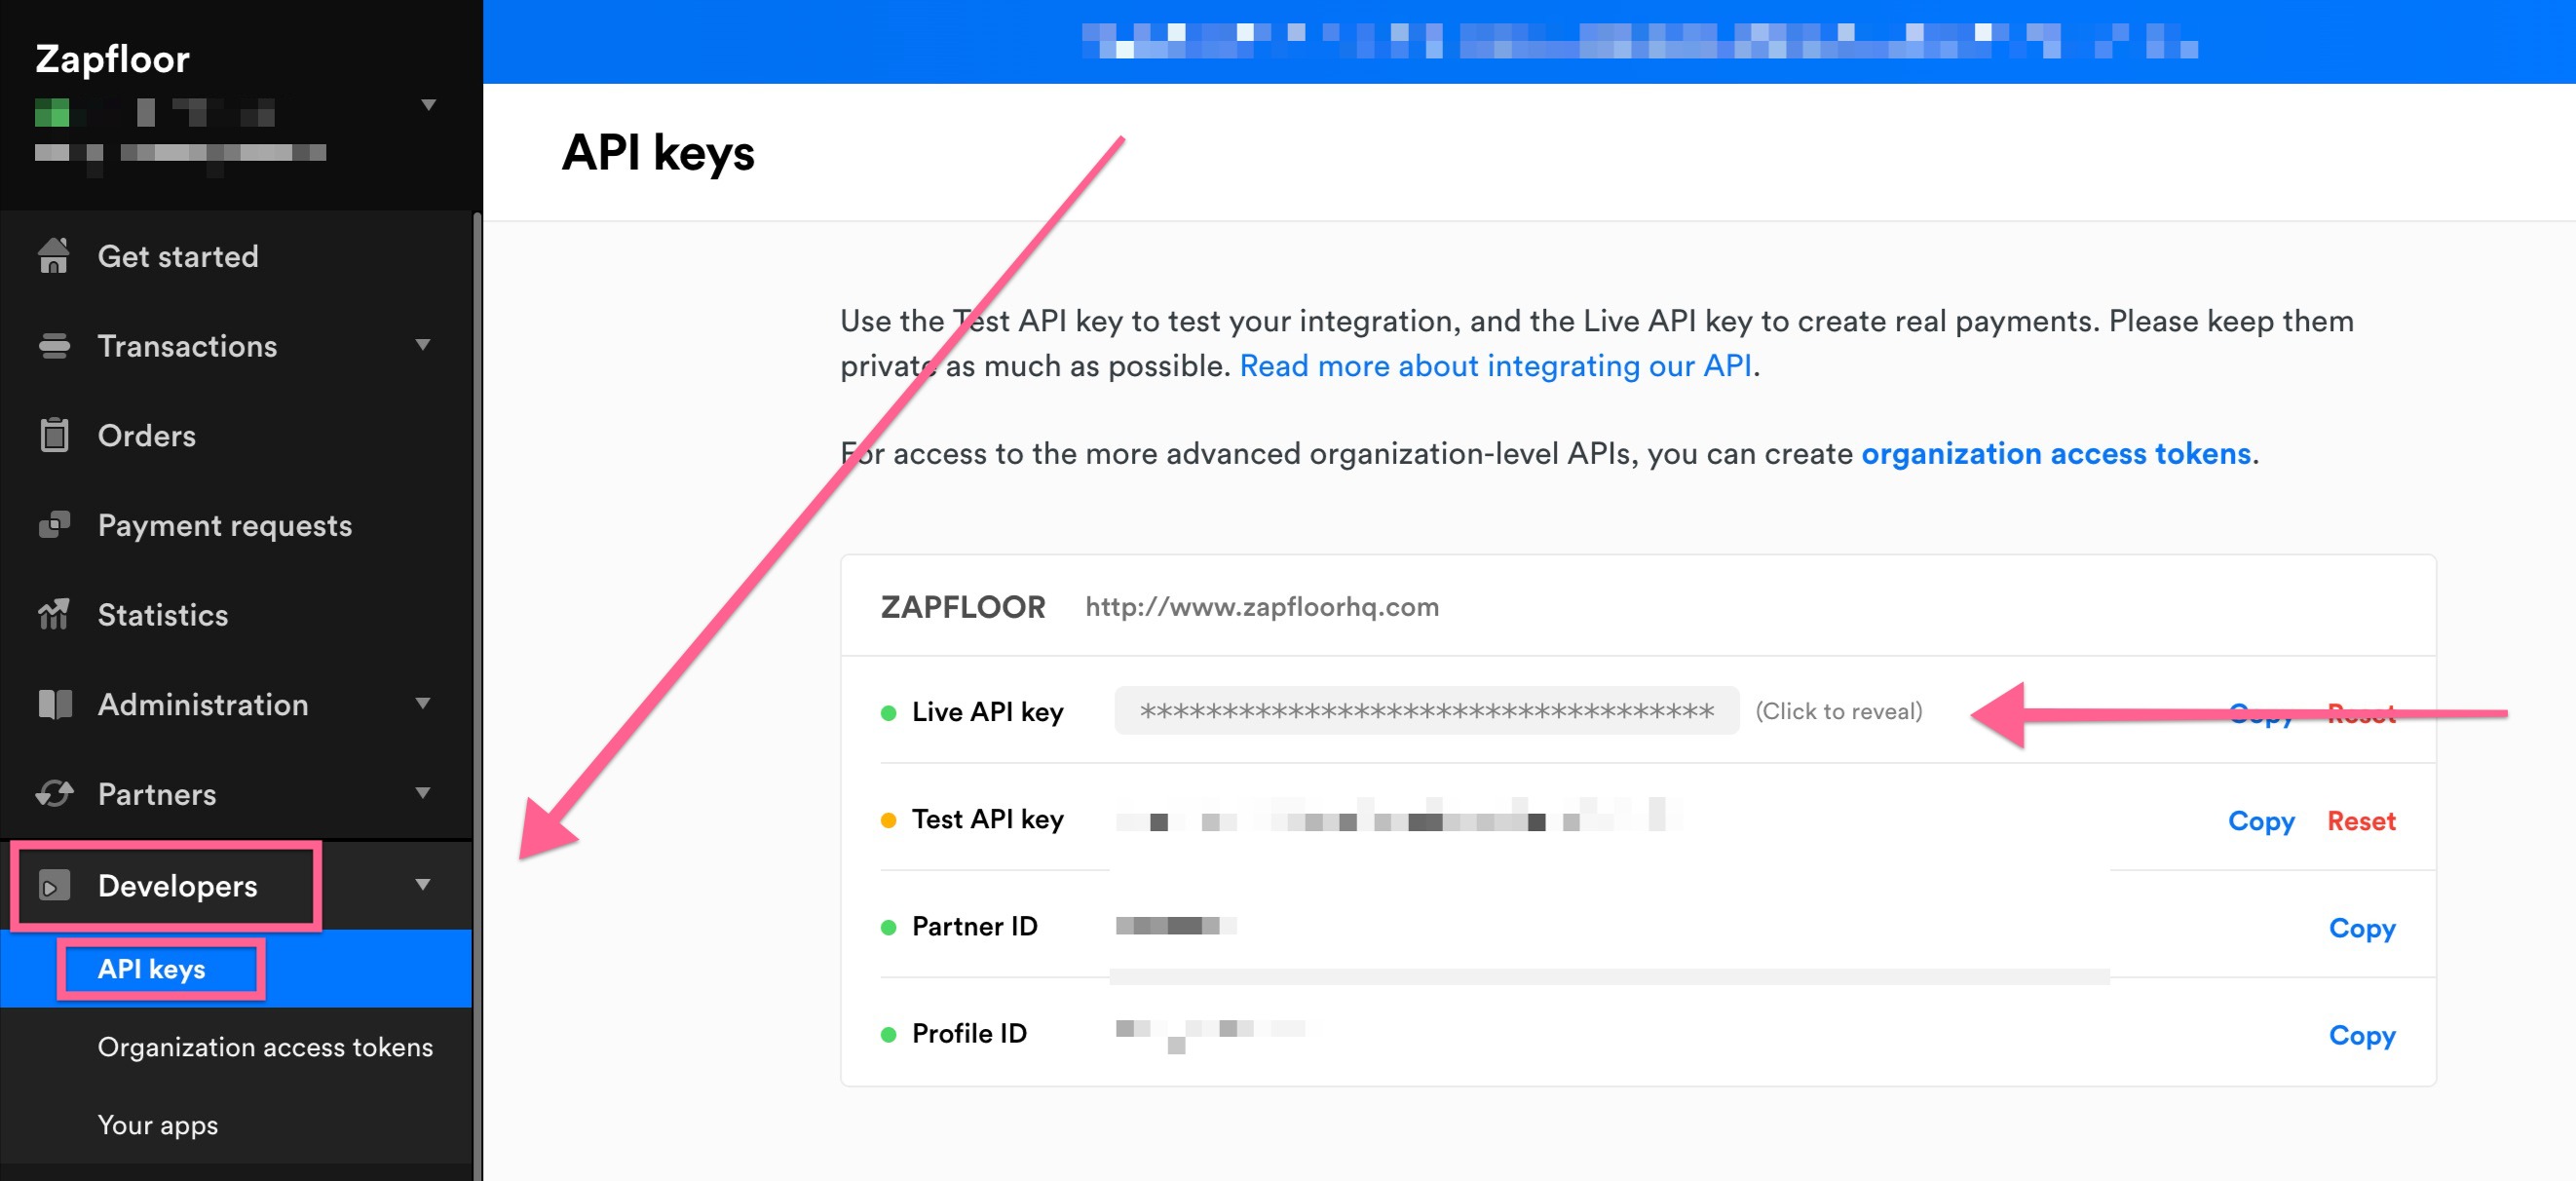
- Sign in to your Mollie account and navigate to Developers > API Keys.
- Copy the Live API key.

- In Zapfloor, go to Integrations > Mollie.
- If Mollie isn’t listed, contact [email protected].
- Paste the Live API key into the appropriate field.
- In the Redirect URL field, specify a page on your website where customers will be redirected after paying with Mollie.
- Toggle Enable Mollie and click Save.

4. Add Mollie Integration Code to Your Invoice Emails
- Add the provided code to your invoice emails in Zapfloor to allow your customers to use the pay now button.
- Contact [email protected] for assistance if needed.
Here is the code to add to your invoice emails:
{% if invoice.is_creditnote %}
text here for creditnote, for example: "Attached you can find the credit note."
{% else %}
{% if active_mandate %} text here for mandate, for example: "This invoice is for adminstrative purposes only, the transaction will be carried out automatically via direct debit on the due date."
{% else %}
{% if payment_url != blank %}
text here for payment link incl {{ payment_url }}, this could be a button, and usually includes a list of available payment methods.
{% else %}
text if there is no payment link, for example: "You can pay the invoice using the bank details stated on the pdf."
{% endif %}
{% endif %}
{% endif %}
Add the code to these email templates:
- invoice.last_reminder
- invoice.reminder_1
- invoice.reminder_2
- invoice.reminder_3
- invoice.rent_invoice
- invoice.sent
- invoice.variable_invoice
Important: Do not add this code to other emails, as it may not work properly.