To assign access groups to multiple users in one edit, follow these steps:
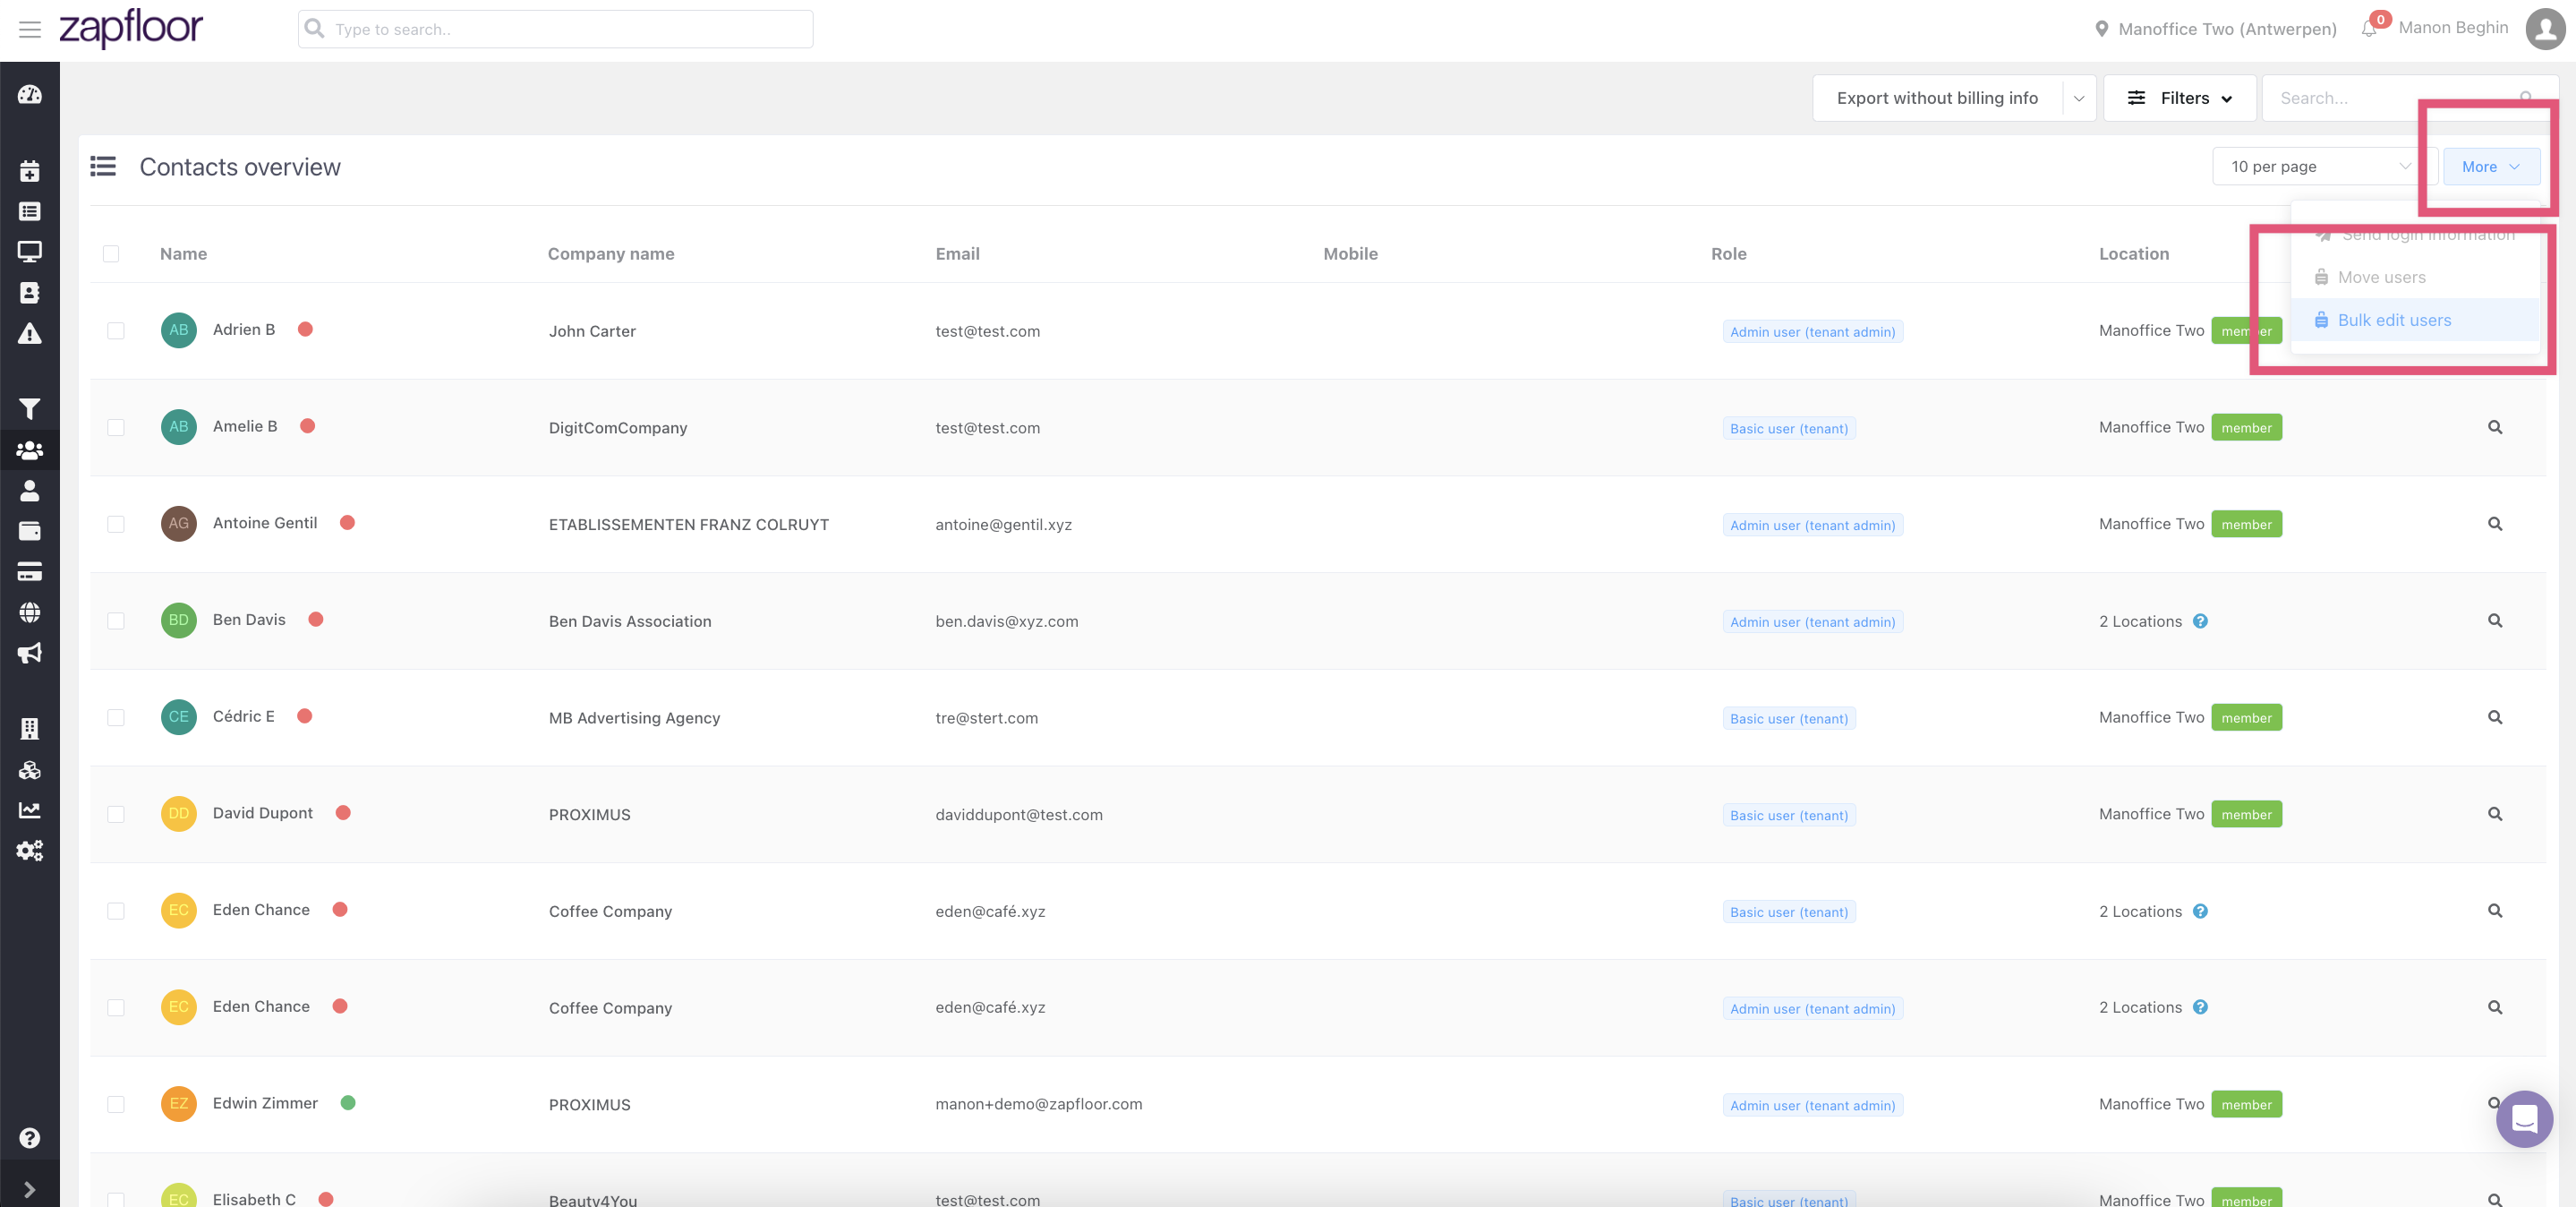
Step 1: Navigate to the Contacts section and click on More, then select Bulk edit users.
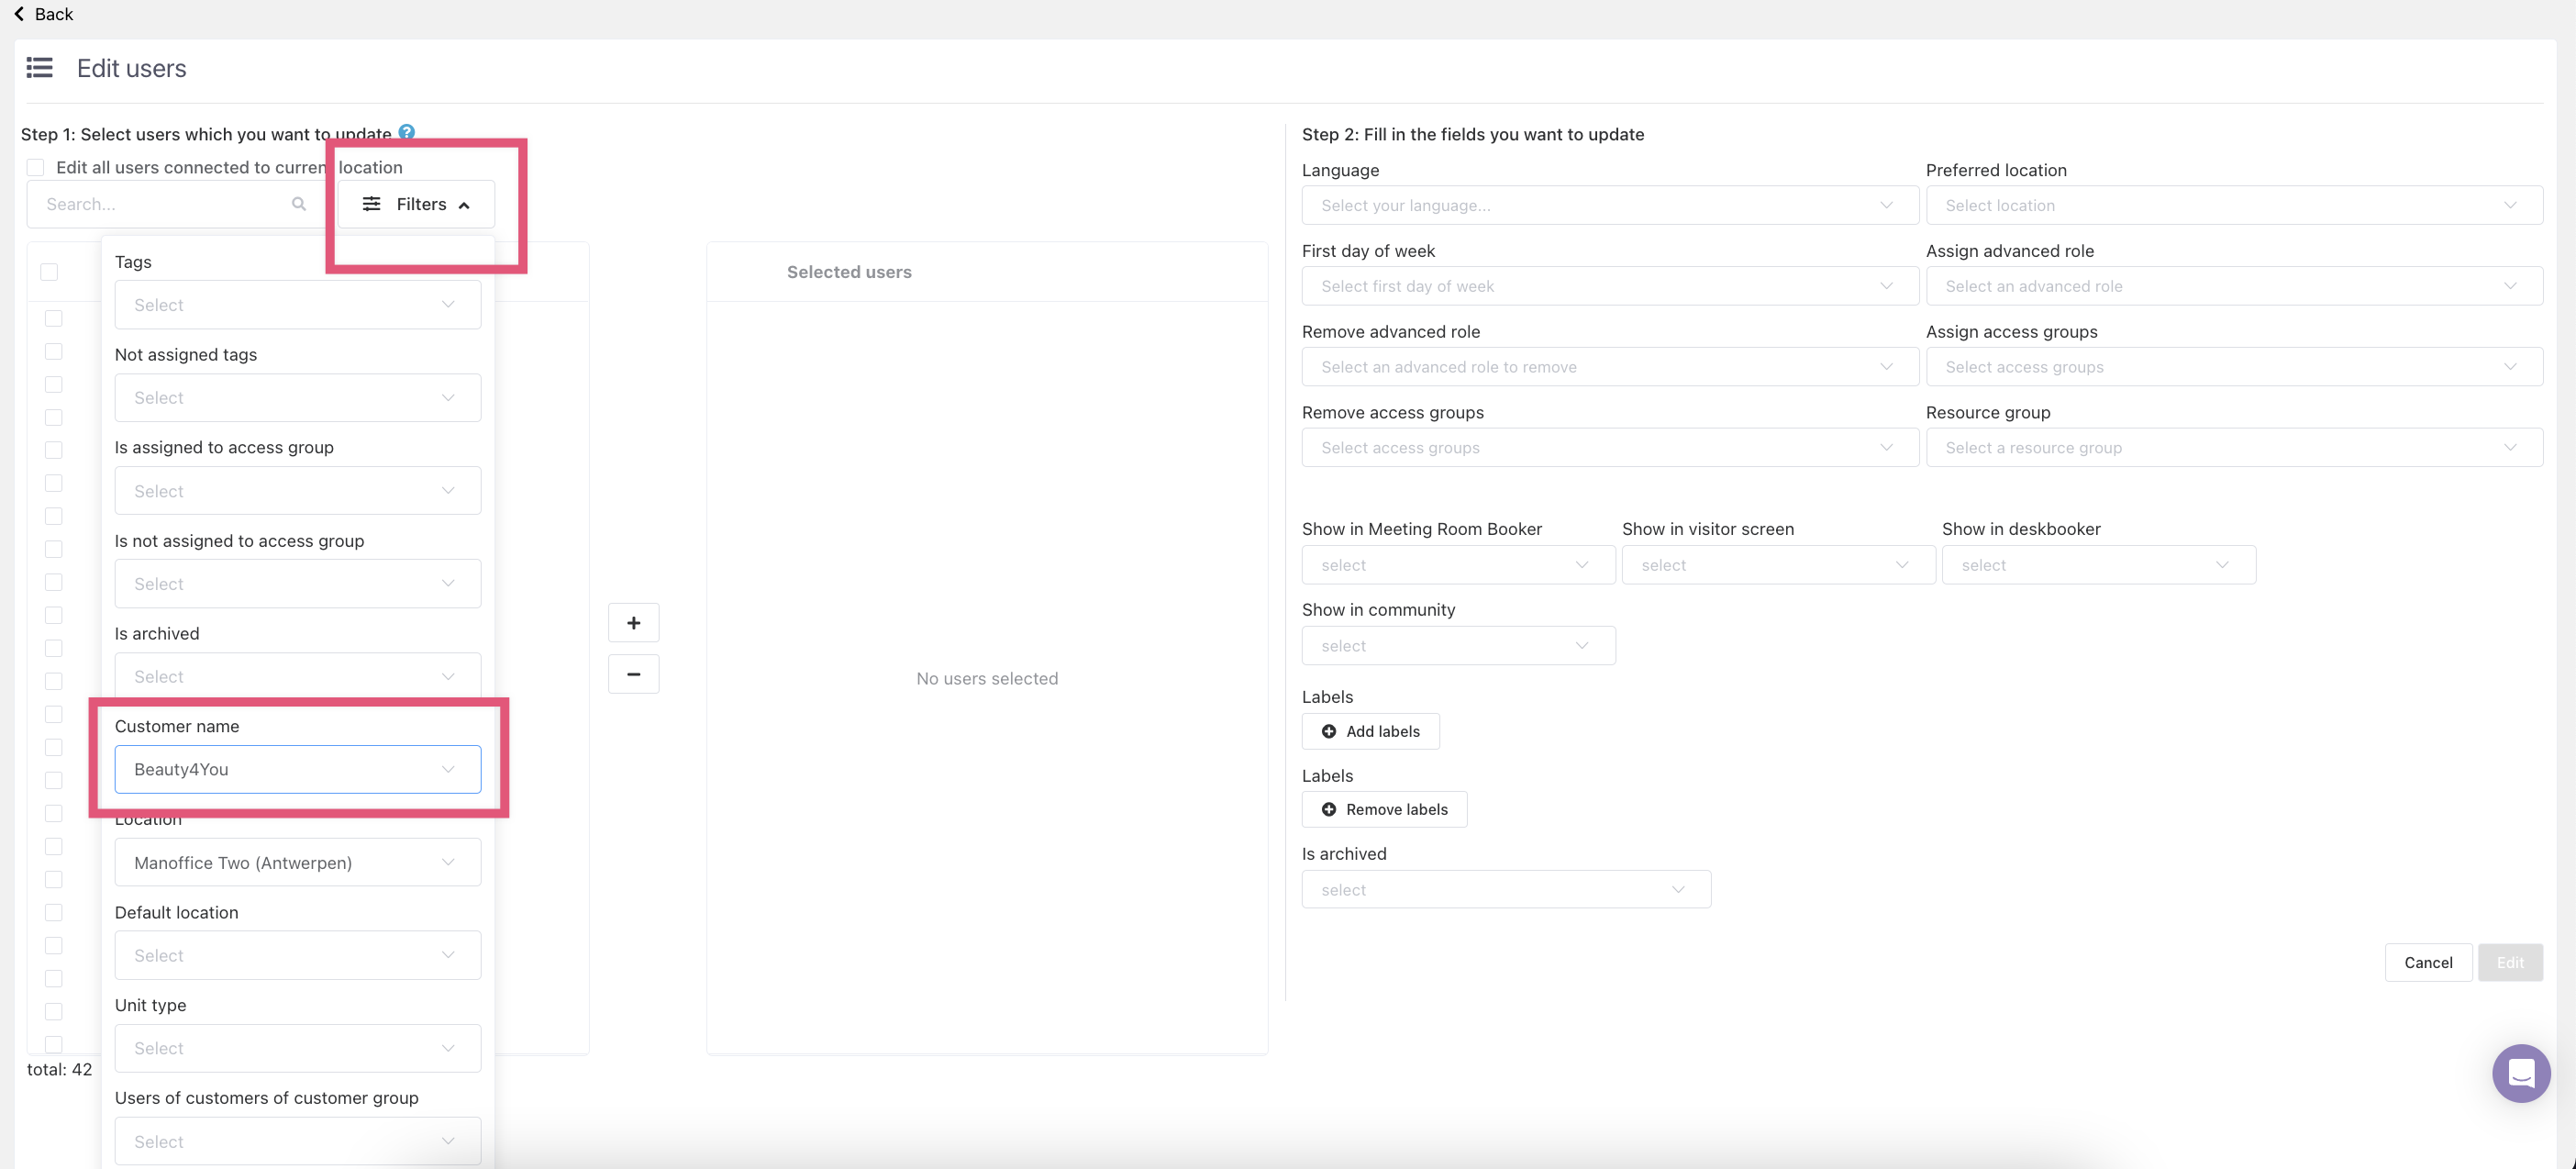
Step 2: Utilize the filters to choose users from different companies. For example, click on Filters, then Customer Name, select a Customer, and click Apply.
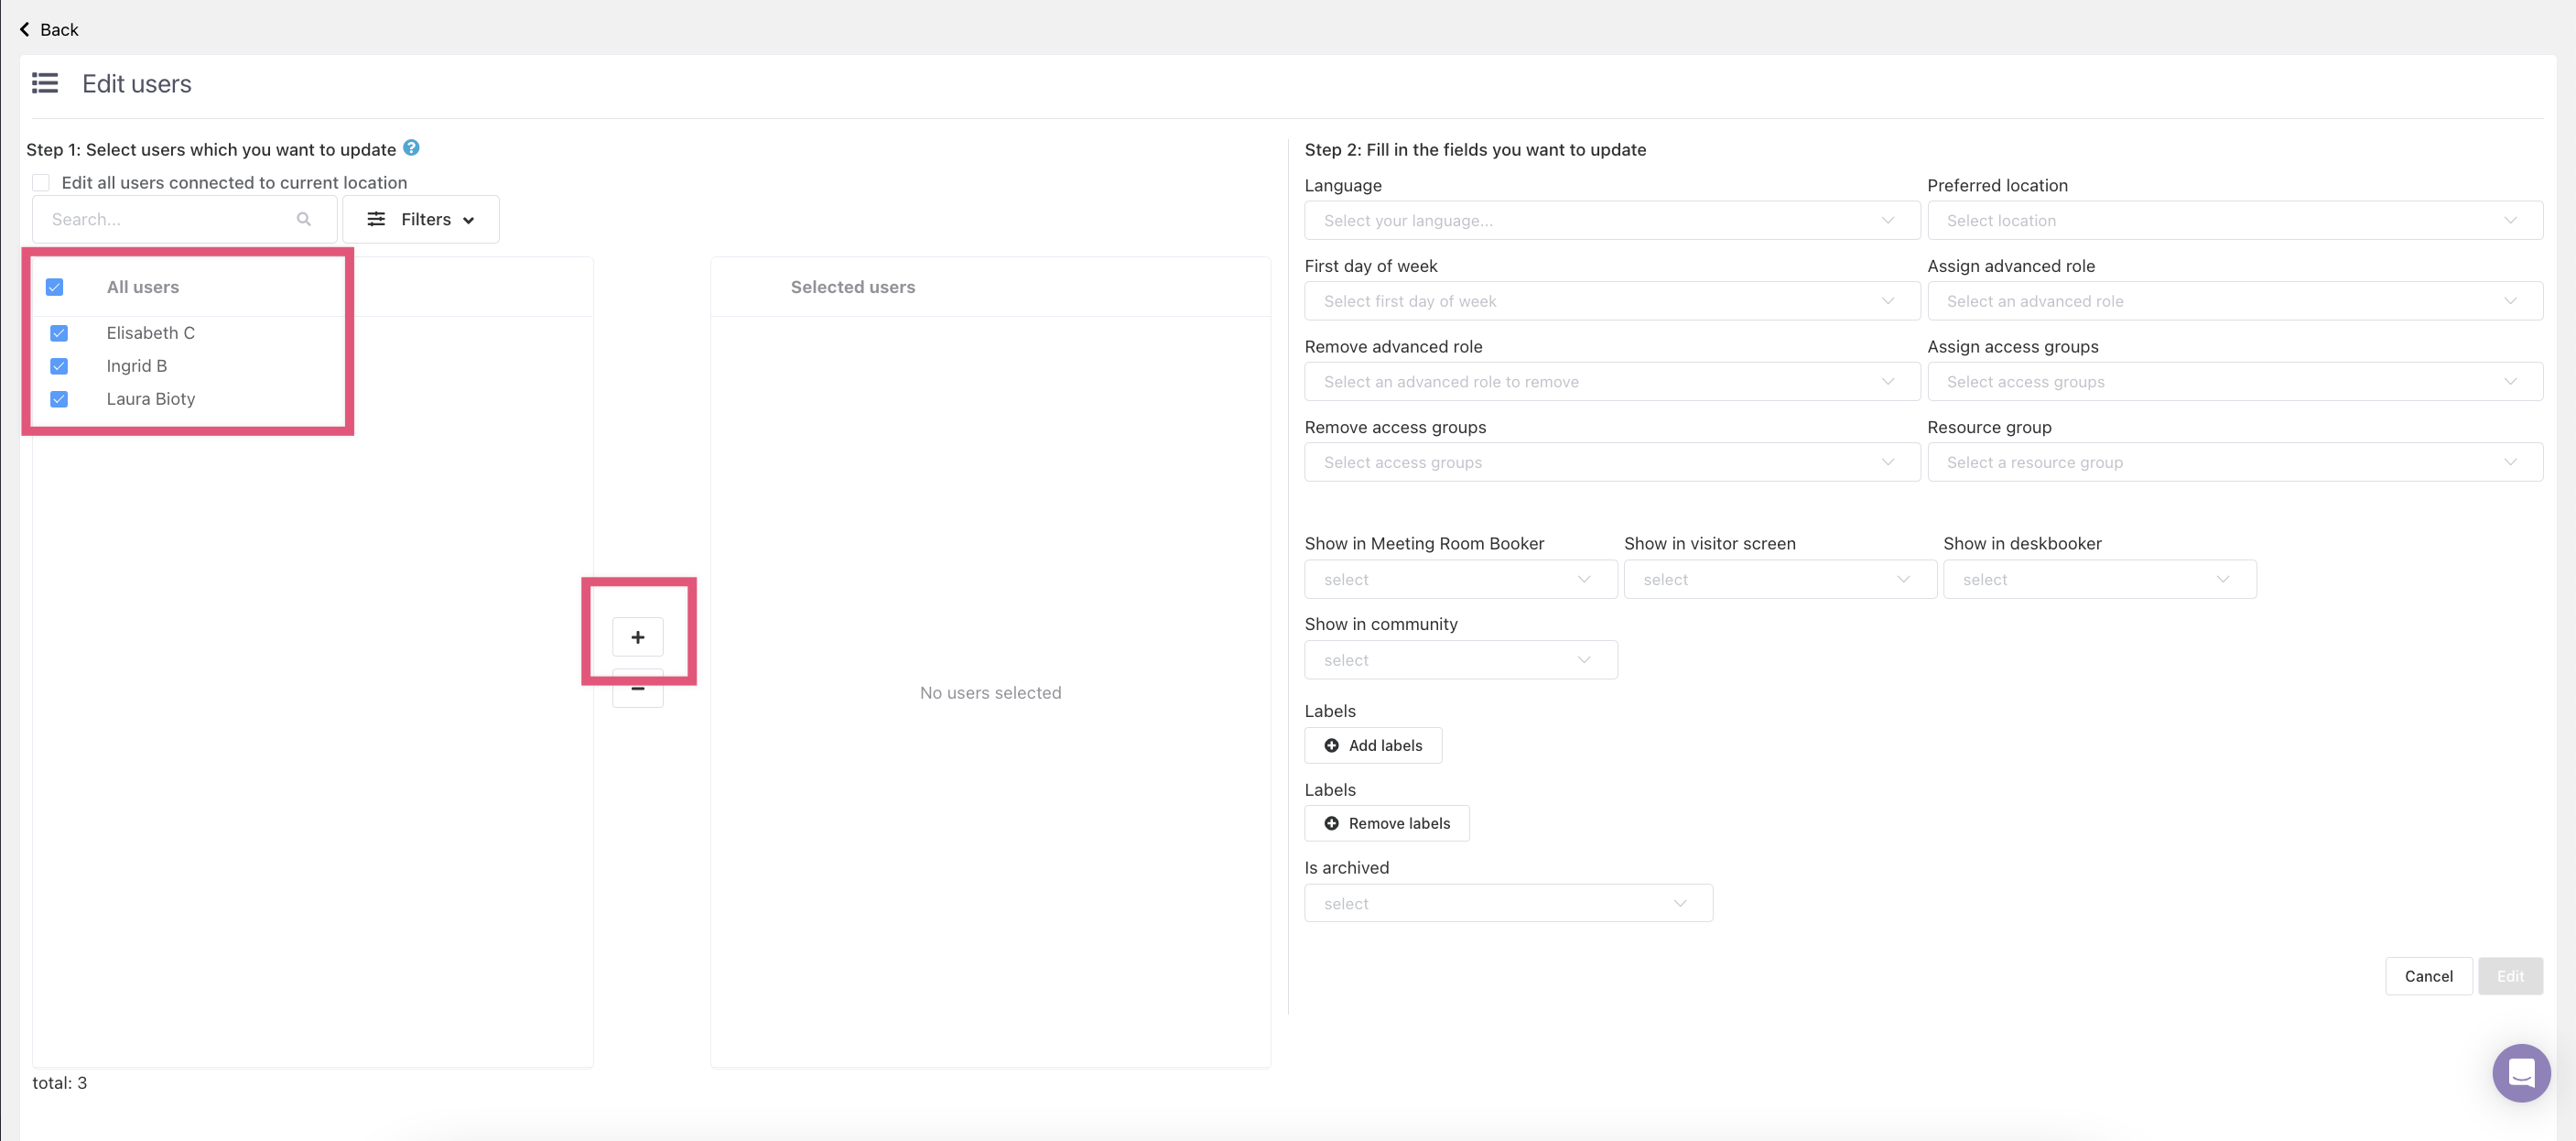
Step 3: Choose all users or specific ones from different companies by clicking on the "+" sign.
Repeat this process to add more users from various customers.

Step 4: After adding all the users you want to assign to the access group, select them, click on Assign access groups, choose the access group(s) from the drop-down menu (you can assign multiple access groups if needed), and remember to click Edit to save your changes.
