![Avatar 8-1.png]](https://support.zapfloorhq.com/hs-fs/hubfs/Avatar%20%208-1.png?height=40&name=Avatar%20%208-1.png)
Step 1: To set this up you need to first login to your Zapfloor Operator environment
Step 2: Once you are logged into your operator account, please proceed to My Center- Email Domain
OR
Paste this into your url- #/my-center/email-domain
This image shows where you need to paste it:

Step 3: Once you are on this page it will show you the instructions to adjust your DKIM Settings so that the mails are sent from your custom domain:
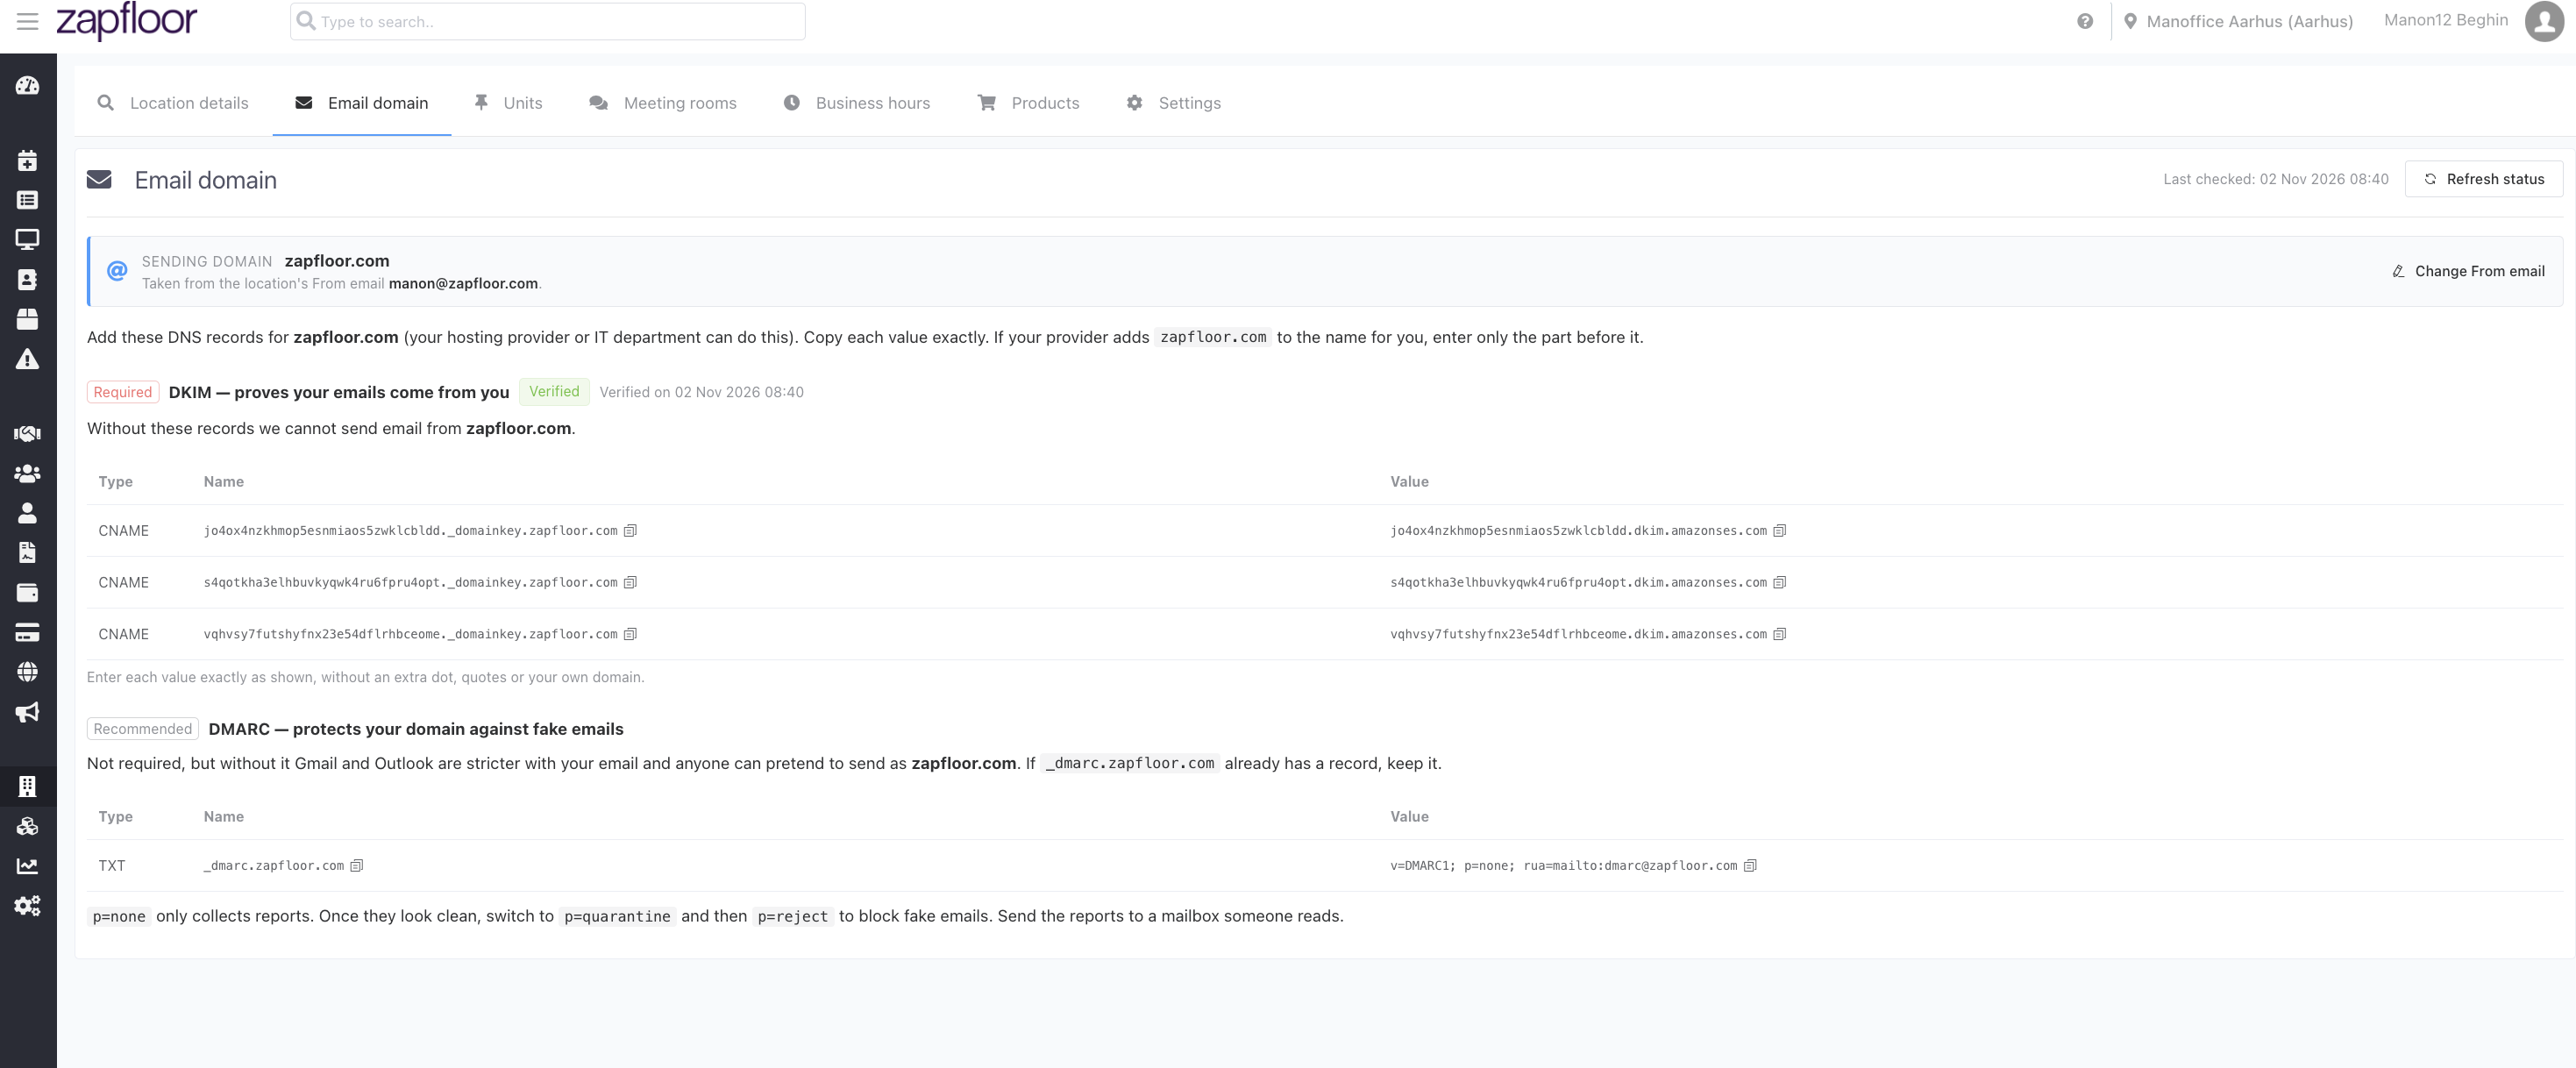
Step 4: After setting it up you can click on Refresh Status button on the top right which will then verify the settings.
Once you have added the new DNS records and sender authentication has been confirmed, Zapfloor will automatically resume sending emails from your previously configured custom email address.
No additional configuration is required in Zapfloor.
Until verification is completed, outgoing emails will continue to be sent from no-reply@zapfloor.com.
Important for tenant billing
If you are planning to invoice your tenants through Zapfloor, we strongly recommend completing the DKIM verification before starting your billing process.
This ensures that invoices, payment notifications and other billing-related emails are sent from your own configured email address rather than the temporary Zapfloor address.
Need help?
If you have questions or experience difficulties updating your DNS records, please contact the Zapfloor support team.